Easy cake pops with cake mix boxes
Is there anything sweeter than a handheld dessert that’s as cute as it is delicious? These easy cake pops are here to steal the show at your next celebration! Whether you’re planning a Valentine’s Day party, a bridal shower, or just need a fun weekend baking project, these little bites of joy are perfect for sharing. They’re soft, sweet, and completely customizable – not to mention incredibly fun to make. Get ready to dip, decorate, and delight your loved ones with these irresistible treats!

Ingredients to make these cake pops
To make this recipe, you’ll need:
- 1 cake mix (9×13 inch) – any flavor you like. I recommend a naturally moist cake mix, like red velvet or chocolate. You can also bake your own cake or use a leftover one – for this recipe, you’ll want approximately 3-4 cups of crumbled cake
- 1 tub (15.6 oz) of Betty Crocker ready frosting – pick the flavor you like and that will compliment your cake well
- 20 lollipop sticks
- 12 oz white chocolate chips (or melting white chocolate)
- pink or red food coloring (as needed)
- heart-shaped chocolates or icing for decoration
- 2 tbsp sprinkles of your choice
- optional: writing icing

How to make cake pops – easy step by step
1. Bake the cake
First, bake the cake according to the package instructions or using your favorite recipe. Allow it to cool completely.

2. Crumble the cake
Once the cake cools, trim off any dry edges of the cake to make sure the final cake pops aren’t dry. Then, crumble the cake very finely in a large bowl. You can do it by hand or using a food processor.

3. Mix the frosting in
Slowly mix in the frosting to the crumbled cake. Start with less frosting (about 1/4 cup) and gradually add more if needed. Mix until fully combined, ensuring there are no dry spots. You can use your hands to help you feel the texture better as you mix it. Aim for a dough-like consistency that holds together well. Too much frosting can make the mixture too wet and difficult to shape.

4. Form the cake pops
Using your hands or a cookie scoop, roll the mixture into small balls, about 1-inch in diameter. You should have about 20 balls. For a special touch, take some of the mixture and shape them into hearts instead of round balls. Place the heart-shaped and round cake balls on a baking sheet lined with parchment paper.
Once formed, refrigerate them for about 30 minutes to firm up (this will make it easier to dip them in chocolate without falling apart).
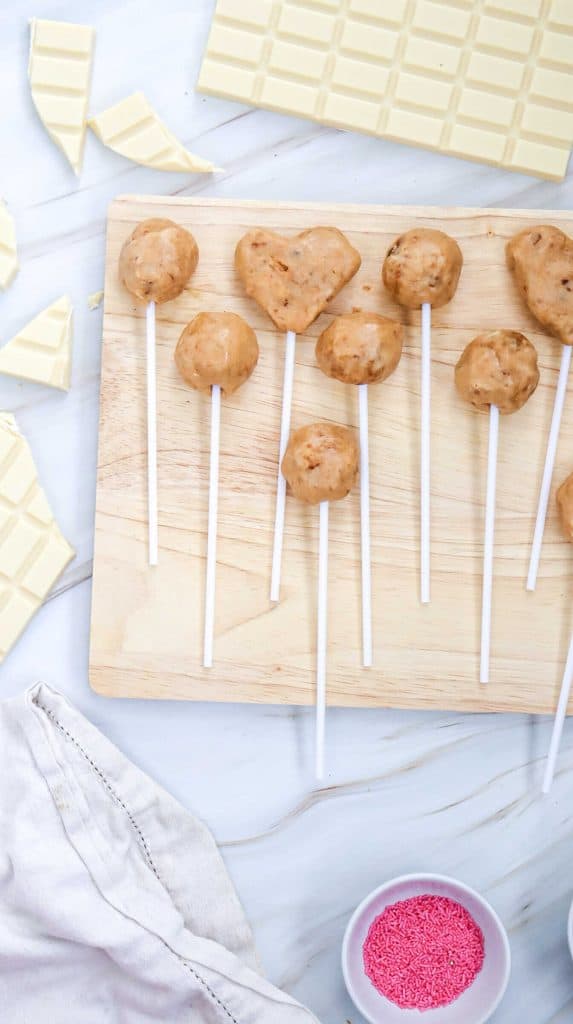
5. Add the lollipop sticks
Melt a small amount of white chocolate (about 1 oz) in the microwave. Dip the end of each lollipop stick into the melted chocolate and then insert it into the center of each cake ball. This step helps to secure the stick. Place them back on the parchment paper and refrigerate again for 30-60 minutes.

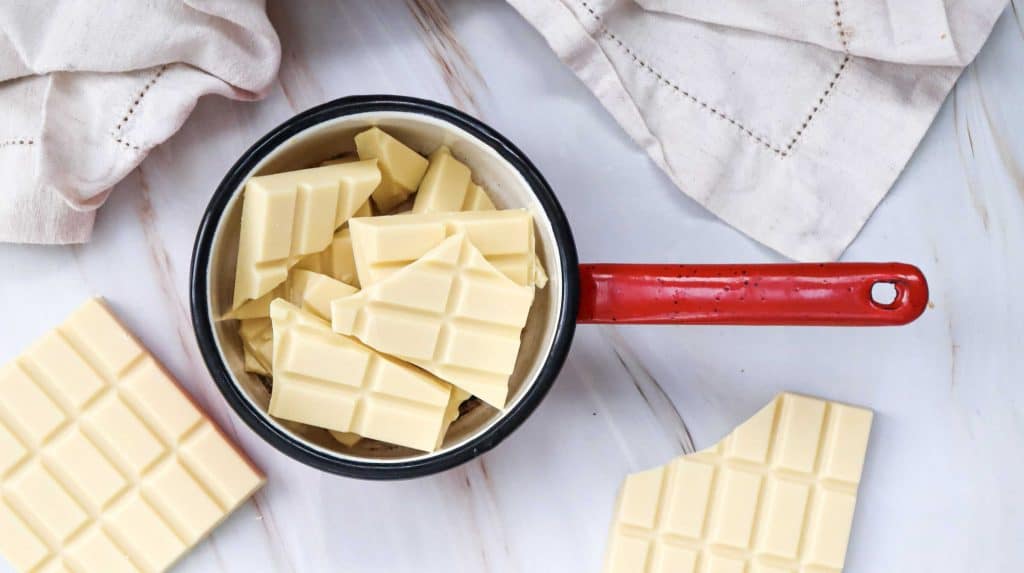
6. Prepare dipping chocolate
In a microwave-safe bowl, melt the remaining white chocolate (11 oz) until smooth. Do this in 30-second intervals, stirring in between to prevent burning. You can also add a bit of coconut oil (about 1 tablespoon per cup of chocolate) for a smoother chocolate consistency.
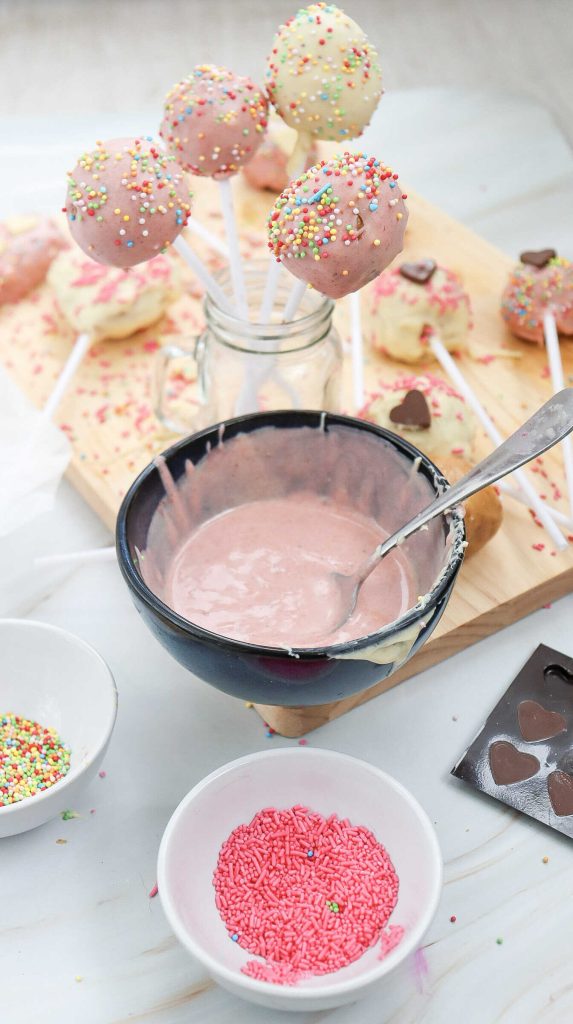
7. Color the chocolate
Divide the melted white chocolate into two bowls. Leave one bowl as is for white chocolate and add pink food coloring (or the food coloring of your choice) to the second bowl, mixing until you reach your desired shade.

8. Dip the cake pops
Dip a part of the cake pops into the bowl of melted white chocolate, ensuring they are fully coated. For the rest of the cake pops, dip them into the pink chocolate until fully coated. After dipping, gently tap the stick against the side of the bowl to remove excess chocolate – this will make the cake pops look smoother.

9. Decorate
Decorate the cake pops with heart shaped chocolates and sprinkles while the chocolate hasn’t fully set yet so it sticks better. If you want to write anything on your cake pops with writing icing, wait until the chocolate sets first.
9. Leave to set and enjoy
Set the cake pops on a cake pop stand to set. If you don’t have a cake pop stand, you can use a block of Styrofoam or even a cardboard box with holes cut out to hold the sticks while the chocolate sets. This way your cake pops won’t fall over and ruin your decorations.
Once decorated, your cake pops are ready to be enjoyed. If you want to, you can make them and refrigerate for up to 2 days in advance before dipping and decorating. Once decorated, store your cake pops in an airtight container in the fridge.

And just like that, you’ve made magic on a stick! These easy cake pops are proof that baking doesn’t have to be complicated to be impressive. Whether you’re handing them out as party favors, gifting them to someone special, or treating yourself to a sweet pick-me-up, these pops are guaranteed to make hearts melt. So grab a stick, take a bite, and let the celebrations begin!


You may also like:


Easy cake pops with cake mix boxes
Ingredients
- 1 cake mix (9×13 inch) – any flavor you like
- 1 tub Betty Crocker ready frosting (15.6 oz) – any flavor you like
- 20 lollipop sticks
- 12 oz white chocolate chips
- food coloring of your choice
- heart-shaped chocolates for decoration (optional)
- 2 tbsp sprinkles of your choice
- writing icing (optional)
Instructions
- Bake the cake according to the package instructions or using your favorite recipe. Allow it to cool completely.
- Once the cake cools, trim off any dry edges of the cake to make sure the final cake pops aren't dry. Then, crumble the cake very finely in a large bowl. You can do it by hand or using a food processor.
- Slowly mix in the frosting to the crumbled cake. Start with less frosting (about 1/4 cup) and gradually add more if needed. Mix until fully combined, ensuring there are no dry spots. You can use your hands to help you feel the texture better as you mix it. Aim for a dough-like consistency that holds together well. Too much frosting can make the mixture too wet and difficult to shape.
- Using your hands or a cookie scoop, roll the mixture into small balls, about 1-inch in diameter. You should have about 20 balls. For a special touch, take some of the mixture and shape them into hearts instead of round balls. Place the heart-shaped and round cake balls on a baking sheet lined with parchment paper.Once formed, refrigerate them for about 30 minutes to firm up (this will make it easier to dip them in chocolate without falling apart).
- Melt a small amount of white chocolate (about 1 oz) in the microwave. Dip the end of each lollipop stick into the melted chocolate and then insert it into the center of each cake ball. This step helps to secure the stick. Place them back on the parchment paper and refrigerate again for 30-60 minutes.
- In a microwave-safe bowl, melt the remaining white chocolate (11 oz) until smooth. Do this in 30-second intervals, stirring in between to prevent burning. You can also add a bit of coconut oil (about 1 tablespoon per cup of chocolate) for a smoother chocolate consistency.
- Divide the melted white chocolate into two bowls. Leave one bowl as is for white chocolate and add pink food coloring (or the food coloring of your choice) to the second bowl, mixing until you reach your desired shade.
- Dip a part of the cake pops into the bowl of melted white chocolate, ensuring they are fully coated. For the rest of the cake pops, dip them into the pink chocolate until fully coated. After dipping, gently tap the stick against the side of the bowl to remove excess chocolate – this will make the cake pops look smoother.
- Decorate the cake pops with heart shaped chocolates and sprinkles while the chocolate hasn't fully set yet so it sticks better. If you want to write anything on your cake pops with writing icing, wait until the chocolate sets first.
- Set the cake pops on a cake pop stand to set. If you don't have a cake pop stand, you can use a block of Styrofoam or even a cardboard box with holes cut out to hold the sticks while the chocolate sets. This way your cake pops won't fall over and ruin your decorations.