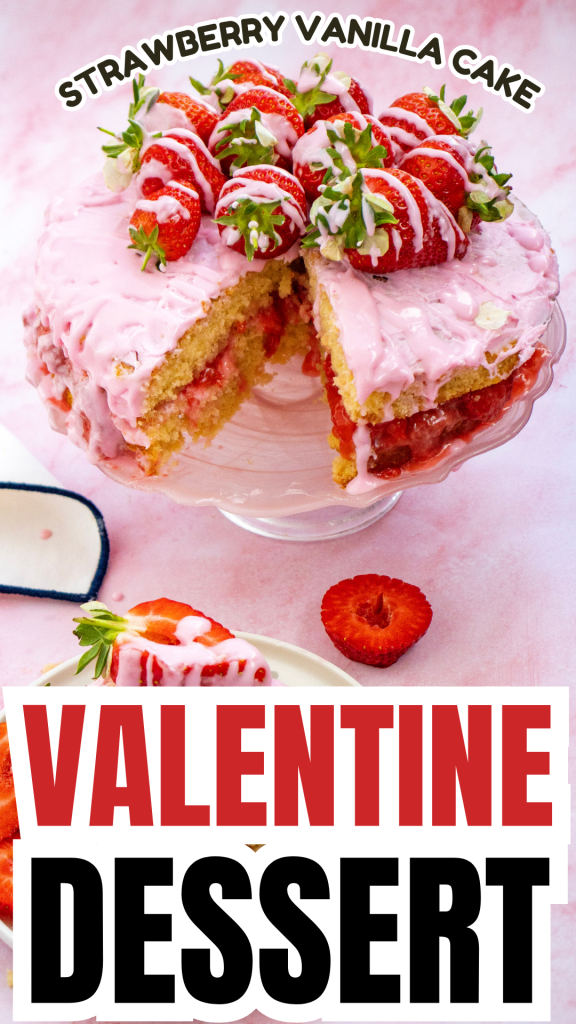
Valentine’s Day Cake: Romantic Vanilla Layer Cake With Fresh Strawberry Filling
If you want a Valentine’s Day cake that feels special without being fussy, this romantic vanilla layer cake delivers. You get tender vanilla cake, a bright strawberry filling and an easy frosting finish that looks bakery-pretty. Grab two cake pans and let’s bake it for someone you love (including you)!

Why you’ll love this cake
- Classic vanilla flavor that stays soft and tender
- Fresh strawberry filling that adds a bright, fruity layer
- Simple assembly that still makes for a celebration-worthy dessert
- Great for Valentine’s Day, Galentine’s, birthdays, and showers
What you’ll need
- Two 9-inch (23 cm) round cake pans
- Parchment paper (highly recommended)
- Electric mixer
- Medium saucepan
- Wire rack for cooling
- Offset spatula or a butter knife for frosting
If you have a kitchen scale, it makes cake baking more consistent, especially for flour.
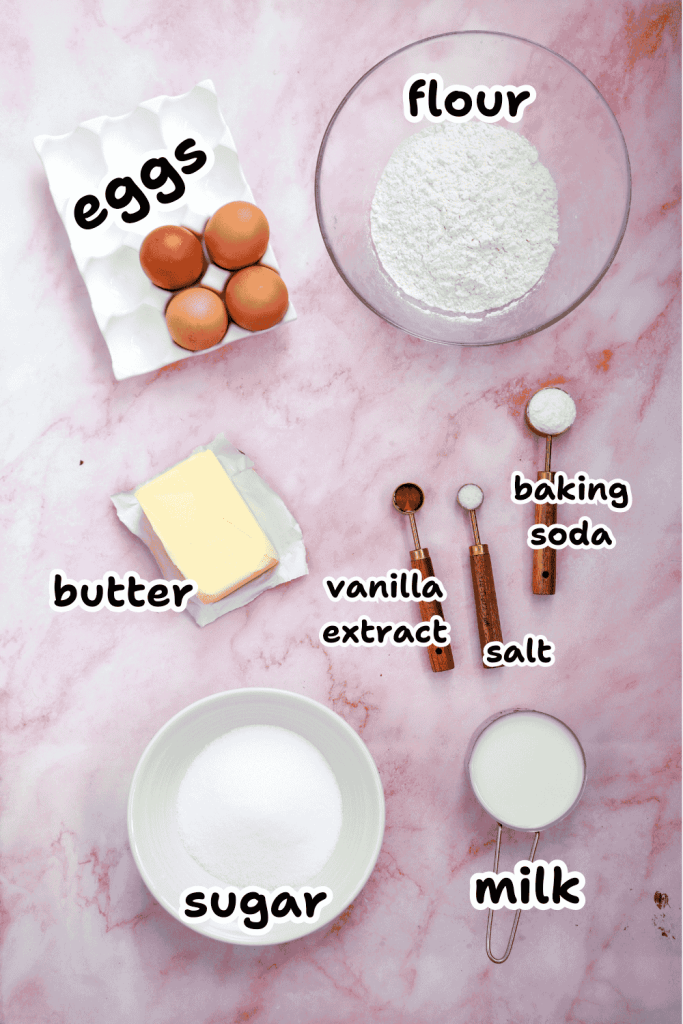
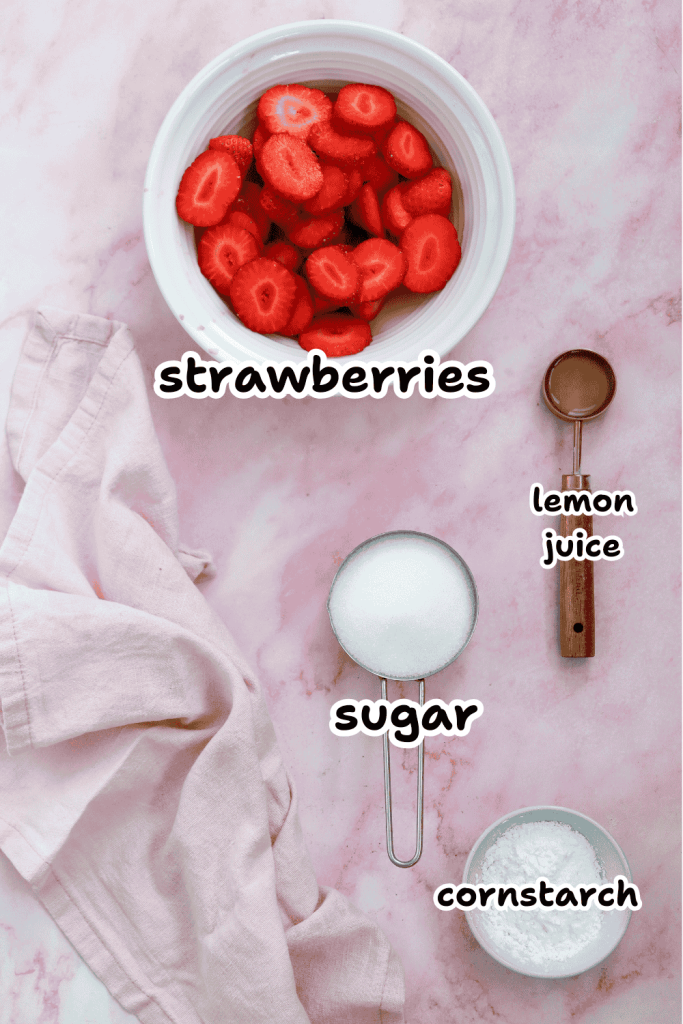
Ingredients
Vanilla cake
- 2 1/2 cups all-purpose flour (300 g)
- 2 teaspoons baking powder (8 g)
- 1/2 teaspoon salt (3 g)
- 1 cup unsalted butter, softened (226 g)
- 1 1/2 cups granulated sugar (300 g)
- 4 large eggs, room temperature
- 1 tablespoon pure vanilla extract (15 ml)
- 1 cup whole milk or buttermilk (240 ml)
Strawberry filling
- 2 cups fresh strawberries, hulled and sliced (about 300 g)
- 1/2 cup granulated sugar (100 g), adjust to taste
- 1 tablespoon lemon juice (15 ml)
- 2 tablespoons cornstarch (16 g)
- 2 tablespoons water (30 ml)
Frosting and decorating
- 1 tub whipped strawberry frosting, about 12 oz (340 g) – I used Betty Crocker Whipped Strawberry Frosting
- Whole strawberries for decorating (optional)
Tip: Whipped frosting is softer than buttercream, so chilling the cake before slicing really helps.
Step-by-step instructions
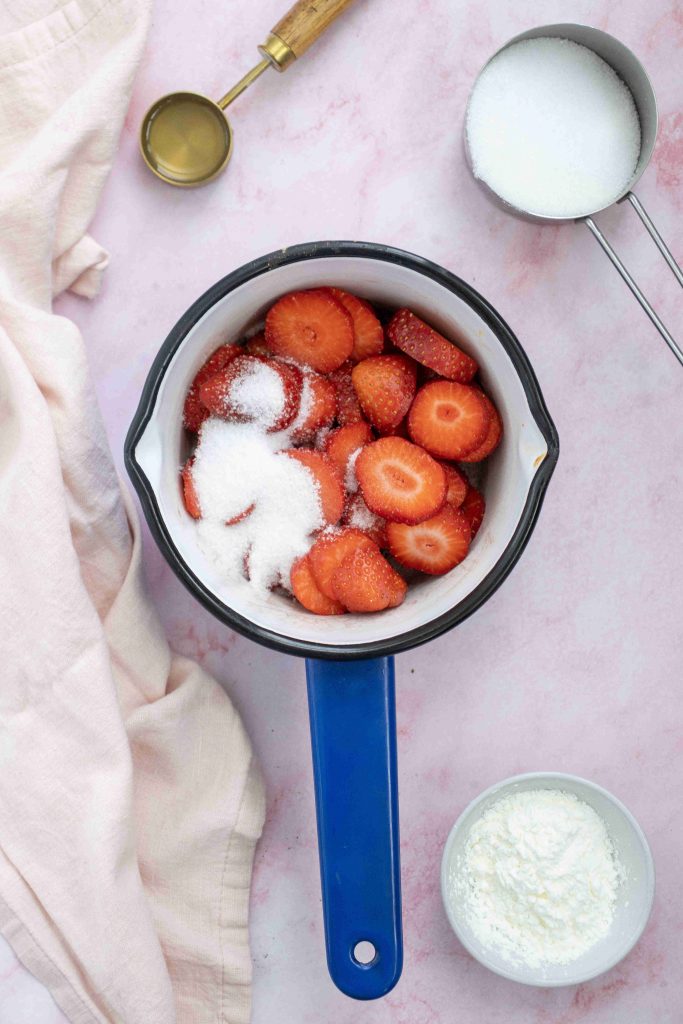
1) Make the strawberry filling
- Add the sliced strawberries, sugar, and lemon juice to a medium saucepan. Let sit for 15 to 20 minutes so the berries release their juices.
- In a small bowl, whisk cornstarch with water until completely smooth.
- Stir the cornstarch mixture into the strawberries.
- Cook over medium heat, stirring gently, until the mixture thickens and starts to bubble, about 5 to 7 minutes.
- Remove from heat and cool completely.
Tips that make this step easier:
- You want the filling thick enough to spread like a loose jam. If it seems thin, cook it 1 to 2 minutes longer.
- Cool it fully before assembling. Warm filling can melt frosting and make layers slide.
- If your strawberries are very juicy, you may need to extend the cook time a bit to get a sliceable filling.
2) Prep pans and preheat the oven
- Preheat the oven to 350°F (175°C).
- Grease two 9-inch (23 cm) round cake pans, line the bottoms with parchment, then lightly flour the sides (or use baking spray with flour).
Parchment rounds are the simplest “no sticking” insurance.
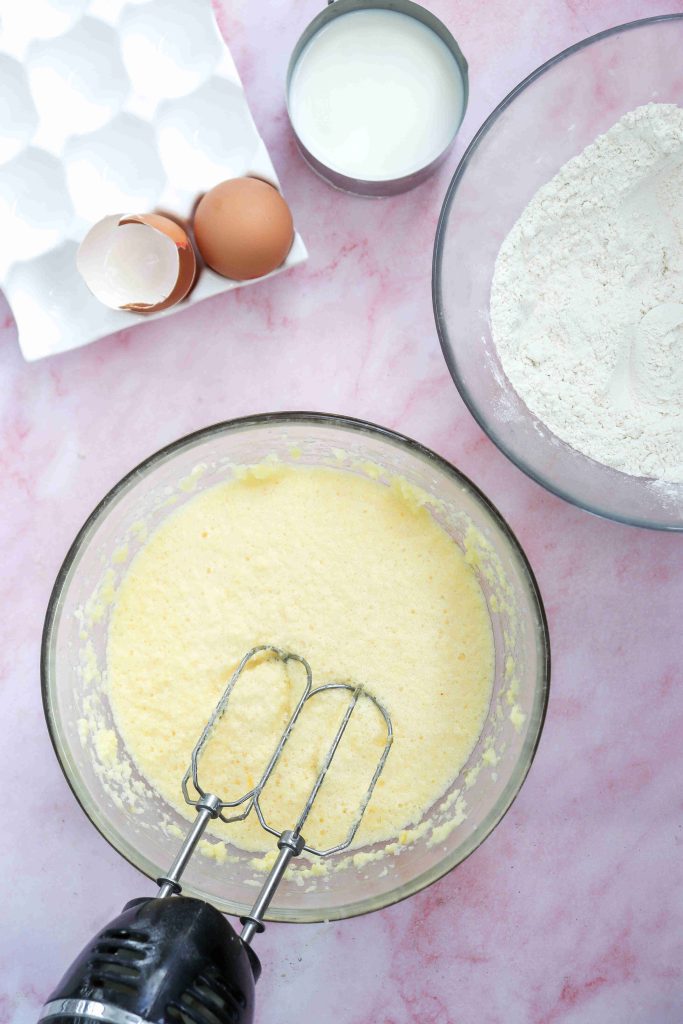
3) Mix the cake batter
- In a medium bowl, whisk together the flour, baking powder, and salt.
- In a large bowl, beat the softened butter and sugar on medium speed until pale and fluffy, about 4 to 5 minutes.
- Add the eggs one at a time, mixing well after each addition. Mix in the vanilla extract.
- Add the dry ingredients in three additions, alternating with the milk (or buttermilk), beginning and ending with the dry ingredients. Mix on low and stop as soon as the batter looks smooth.
Tips for a tender crumb:
- Room-temperature butter and eggs blend more smoothly, and the cake bakes more evenly.
- Do not overmix once the flour goes in, mixing too long can make the cake dense.
- If the batter looks slightly curdled after adding eggs, it usually comes together once you add the flour and milk.
4) Bake the cake
- Divide the batter evenly between the prepared pans.
- Bake for 25 to 30 minutes, until a toothpick inserted in the center comes out clean or with a few moist crumbs.
- Cool the cakes in the pans for 10 minutes, then turn out onto a wire rack to cool completely.
Tips for even layers:
- If your oven runs hot, start checking at 25 minutes.
- For flatter layers, you can use cake strips if you have them (optional).
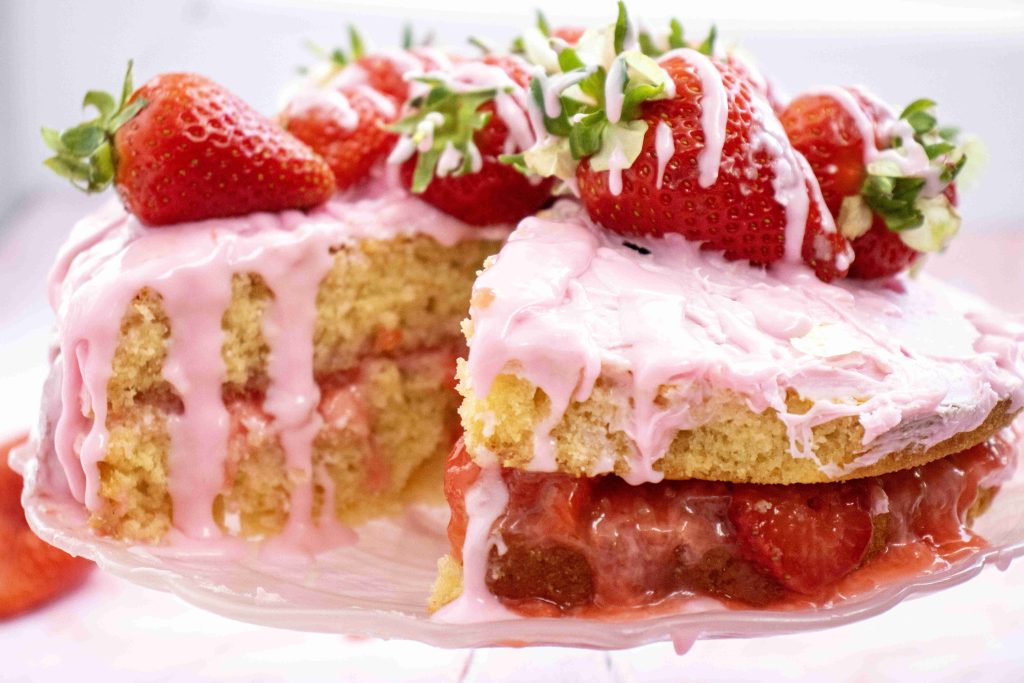
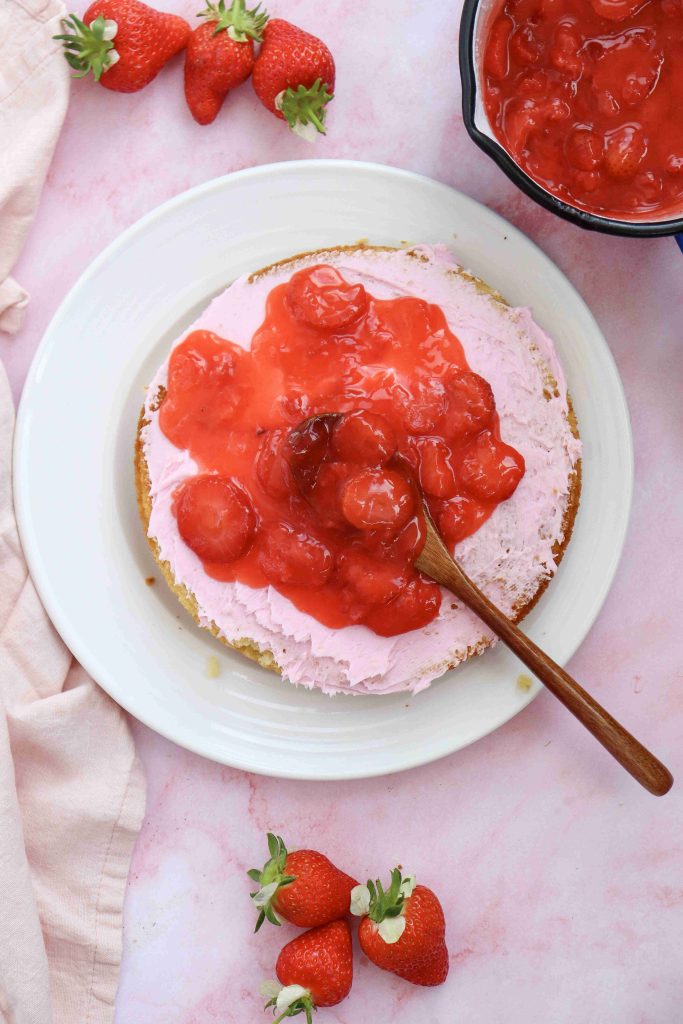
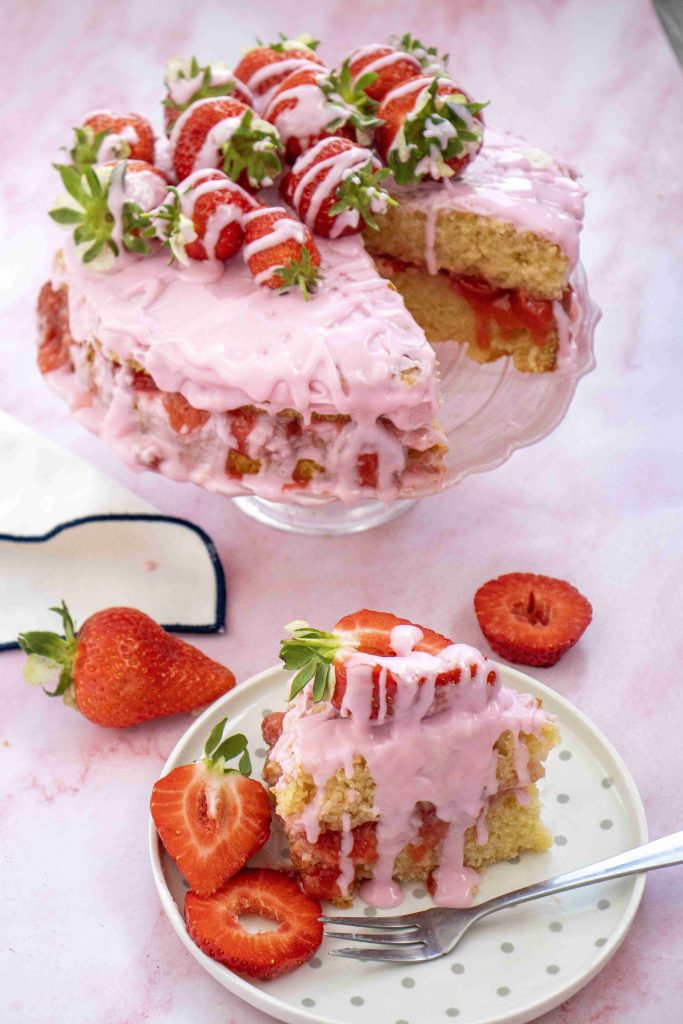
5) Assemble and frost
- Once fully cooled, level the tops if needed (optional, but it helps the layers sit flat).
- Place one cake layer on a serving plate.
- Spread a thin ring of frosting around the edge of the cake layer to create a “dam.” This keeps the filling from squeezing out.
- Spoon the cooled strawberry filling into the center and spread evenly, leaving about 1/2 inch (1 to 2 cm) from the edge.
- Add the second layer on top.
- Frost the top and sides with the whipped strawberry frosting.
- Decorate with whole strawberries if you like.
- Chill the cake for about 45 minutes before slicing.
Tips for clean slices:
- Chill the assembled cake, then slice with a sharp knife wiped clean between cuts.
- If your frosting feels too soft to work with, chill the tub for 10 to 15 minutes before frosting.
Make-ahead and storage
- Make the filling ahead: Up to 2 days ahead, store in the fridge.
- Bake the cake layers ahead: Up to 1 day ahead, wrap tightly and keep at room temperature.
- Freeze the cake layers: Wrap well and freeze up to 1 month. Thaw wrapped at room temperature.
- Store the assembled cake: Refrigerate covered for up to 3 days.
- Best serving texture: Let slices sit at room temperature for 20 to 30 minutes before serving.
Quick troubleshooting
- Filling leaks out: The filling was too warm, too thin, or you skipped the frosting dam. Next time, thicken the filling a bit more and chill before slicing.
- Cake is dense: Butter and sugar were not creamed long enough, or the batter was mixed too much after adding flour.
- Cake seems dry: It was baked a bit too long, or flour was overmeasured. Spoon and level flour (or weigh it) and start checking earlier.

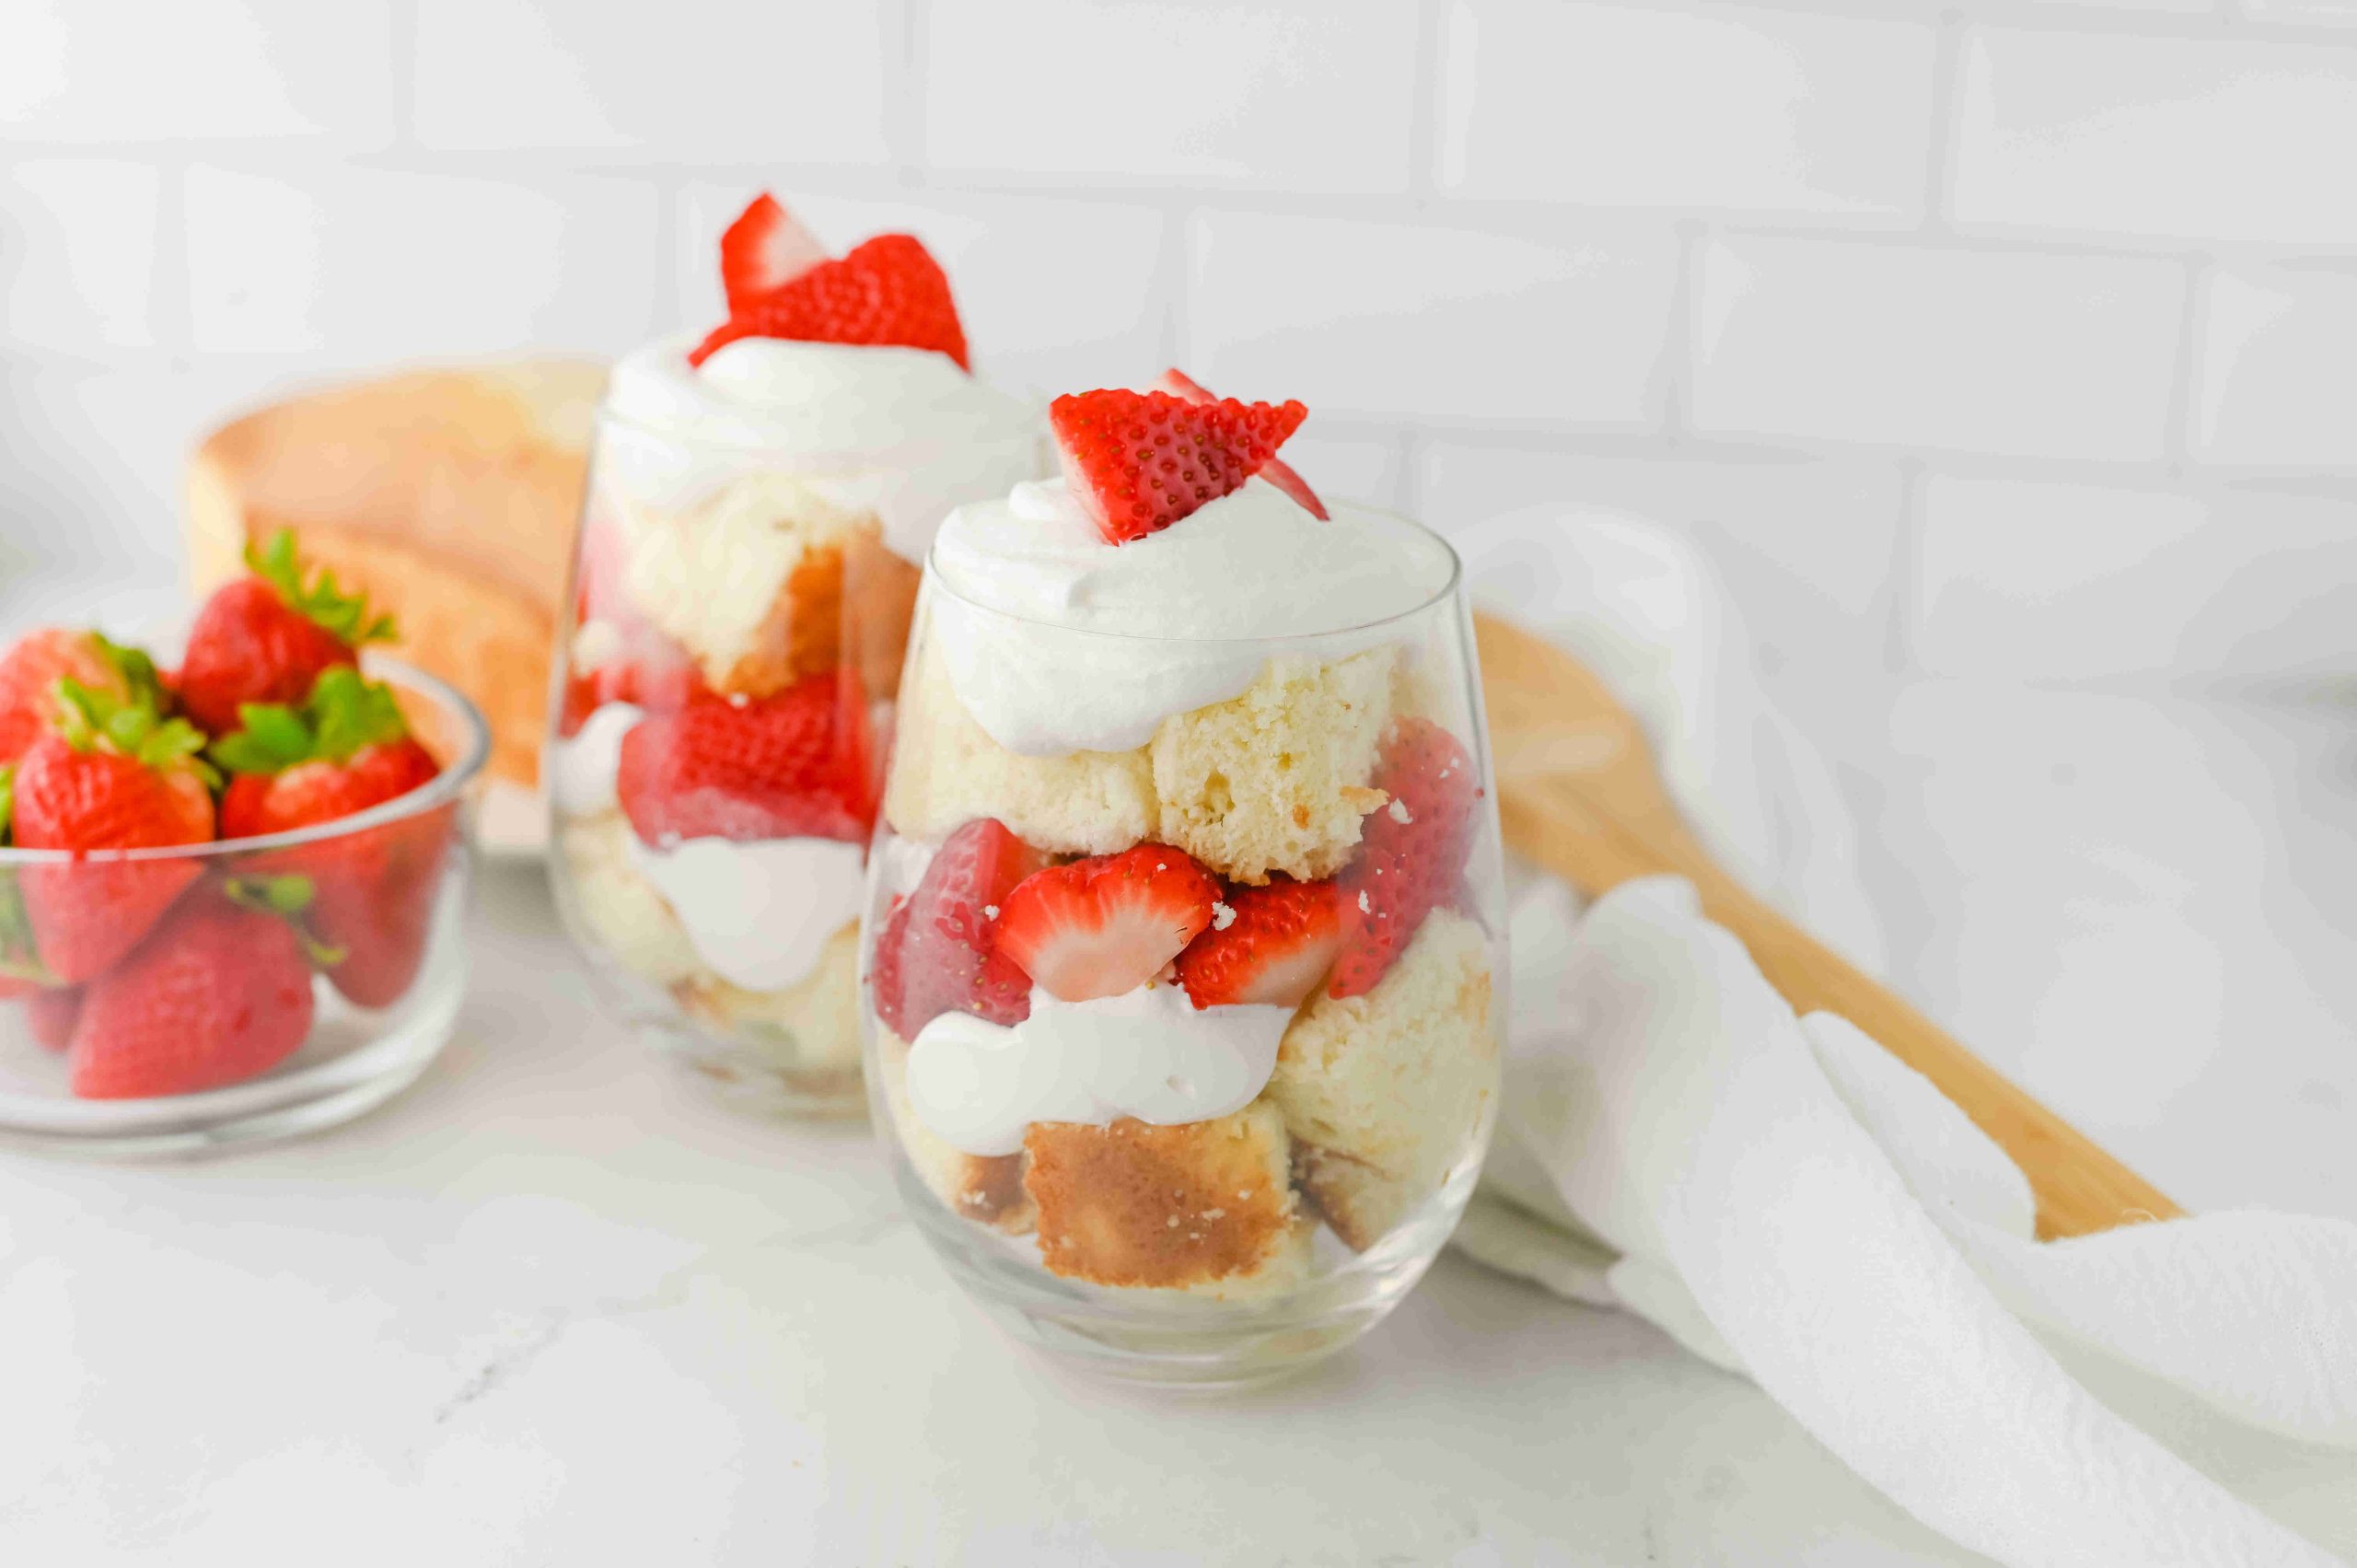
This vanilla layer cake with fresh strawberry filling is made for celebrating, it looks lovely, slices beautifully, and tastes like something you would proudly serve to guests. Pop it in the fridge before slicing, then enjoy. And yes, the flavors get even better the next day!
Romantic Vanilla Layer Cake With Fresh Strawberry Filling
Equipment
- Two 9-inch (23 cm) round cake pans
- Parchment paper (highly recommended)
- electric mixer
- Medium saucepan
- Wire rack for cooling
- Offset spatula or a butter knife for frosting
Ingredients
Vanilla Cake
- 2 1/2 cups all-purpose flour 300 g
- 2 teaspoons baking powder 8 g
- 1/2 teaspoon salt 3 g
- 1 cup unsalted butter softened (226 g)
- 1 1/2 cups granulated sugar 300 g
- 4 large eggs room temperature
- 1 tablespoon vanilla extract 15 ml
- 1 cup whole milk or buttermilk 240 ml
Fresh Strawberry Filling
- 2 cups fresh strawberries hulled and sliced (about 300 g)
- 1/2 cup granulated sugar 100 g, adjust to taste
- 1 tablespoon lemon juice 15 ml
- 2 tablespoons cornstarch 16 g
- 2 tablespoons water 30 ml
Frosting and Decor
- 1 tub whipped strawberry frosting about 12 oz (340 g), or your preferred frosting
- Whole strawberries for topping (optional)
Instructions
Make the strawberry filling
- In a medium saucepan, combine strawberries, sugar, and lemon juice. Let sit 15 to 20 minutes.
- Stir cornstarch and water together until smooth, then add to the saucepan.
- Cook over medium heat, stirring gently, until thickened and bubbling, 5 to 7 minutes.
- Cool completely (this matters for clean layering).
Bake the vanilla cake layers
- Heat oven to 350°F (175°C). Grease and flour two 9-inch (23 cm) round pans, line bottoms with parchment if you can.
- Whisk flour, baking powder, and salt in a bowl.
- Beat butter and sugar until pale and fluffy, 4 to 5 minutes.
- Add eggs one at a time, then mix in vanilla.
- Add dry ingredients in 3 additions, alternating with milk, starting and ending with dry. Mix just until combined.
- Divide batter between pans. Bake 25 to 30 minutes, until a toothpick comes out clean or with a few moist crumbs.
- Cool in pans 10 minutes, then turn out to a rack and cool completely.
Assemble and frost
- Place one cooled cake layer on a plate.
- Spread a thin ring of frosting around the edge to create a “dam.”
- Spread cooled strawberry filling inside the dam, stopping about 1/2 inch (1 to 2 cm) from the edge.
- Add the second layer, then frost the top and sides.
- Chill 45 minutes before slicing (especially important with whipped frosting).
Notes
- If your filling feels loose after cooling, cook it 1 to 2 minutes longer, then cool again.
- For neat slices: use a sharp knife and wipe it clean between cuts.
- Whipped frosting is softer than buttercream, so chill the cake so it holds its shape better for slicing.